In this guide, we will teach you how to re-braid your paracord bracelet so that you can use your paracord and readjust its size if necessary.

We will also show you different knots and ways to braid your bracelet.

But also different tricks and uses of paracord.

Readjust the size of your paracord bracelet (Cobra knot)

If your bracelet is too long and you would like it to be a little more adapted to your wrist then it is possible.

We will show you in this guide how to undo and redo your bracelet, which can also be useful if you need to use the paracord during your excursions.

Step 1: Measure your wrist

To make sure you get the right size, we suggest you measure your wrist with a tape measure or a string if you don’t have one.

mesuration poignet

Step 2: Unwrap the bracelet

In order to readjust it to the right size, you will have to untie your bracelet, to do this locate at one end of the bracelet the 2 ends of the rope, then start to untie the knots.

détressage bracelet

Step 3: Readjust the size

Once all the knots are untied, you should be able to adjust the size of the bracelet.

ajustement taille bracelet 1

Dismantle the first length (as shown in the pictures below).

ajustement taille bracelet 2
ajustement taille bracelet 3

Adjust the central rope to the right length(1) and pull up the first length(2).

ajustement taille bracelet 4
1
ajustement taille bracelet 5
2

It is also possible not to double the length and to start the straightening with the cobra knot with only one length. Doubling the length allows you to strengthen your bracelet and store a little more rope.

Bonus step: complete de-stressing

In case you want to use your paracord, you can completely disassemble the bracelet, instead of reassembling the first length continue disassembly.

bracelet paracorde détressage complet 1
1
bracelet paracorde détressage complet 3
3
bracelet paracorde détressage complet 2
2
bracelet paracorde détressage complet 4
4

Step 4: Cobra knot and re-braiding

Now that you’ve got the right size, all you have to do is make your first cobra knot to seal the length of the bracelet.

Take the bottom rope and loop it over the middle ropes.

noeud cobra boucle 1

Then take the top rope and pass it over the bottom rope.

noeud cobra 2

The top string then passes underneath the middle strings.

noeud cobra 3

Then bring the top rope up through the loop of the bottom rope.

noeud cobra 4

Now all you have to do is pull and seal your first knot.

noeud cobra 5
noeud cobra 6

You will then have to repeat this same knot until you reach the end of the bracelet, the next knot will be the reverse of the first.

(you can also find your way by the little loop that has formed which will tell you that it is on this side that you must start and make the first loop).

noeud cobra repère

Some pictures to understand the cobra knot.

noeud cobra repère
noeud cobra

Step 5: Finalization

Once you have completely re-braided your bracelet by making all your cobra knots, you will have to cut the excess paracord, but not quite flush, leave a few millimeters over.

Bracelet paracorde
finalisation tressage bracelet paracorde 2
finalisation tressage bracelet paracorde 3

And finally, with a lighter, heat what is left and flatten the end. The goal is not to weld it to the rest of the bracelet, but just to make it flat so that it doesn’t come apart.

bracelet paracorde finalisation

You are done, your bracelet is now adjusted to the exact size of your wrist.

Download the guide

Guide Bracelet Paracorde Ebook

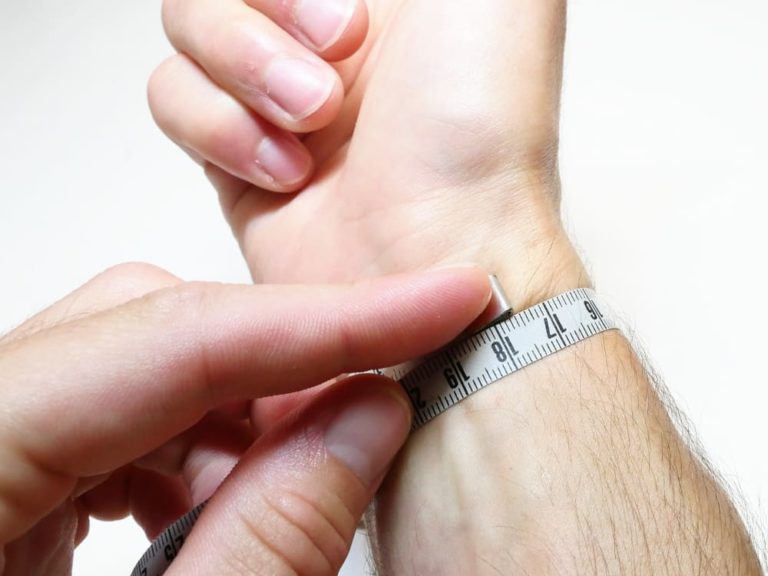
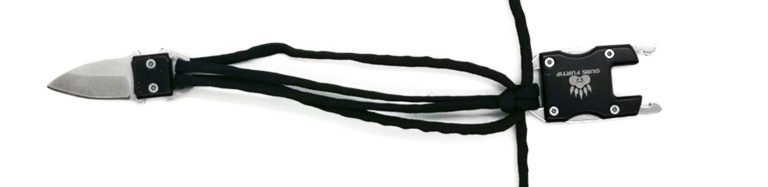
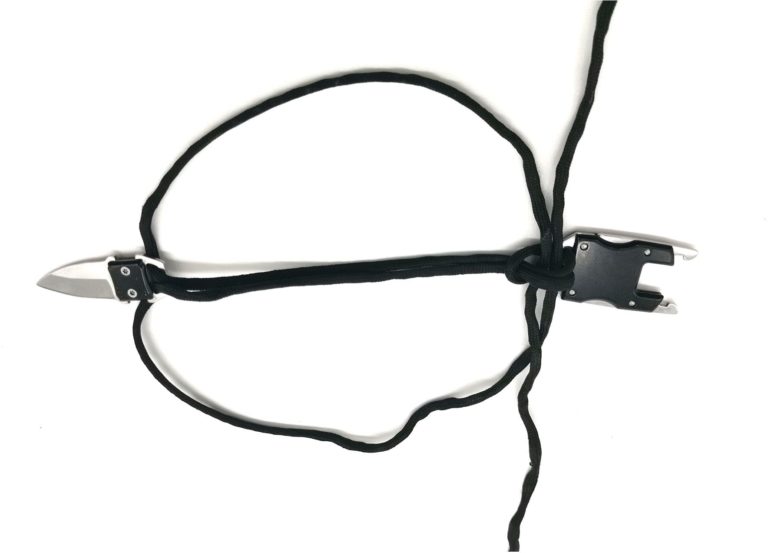
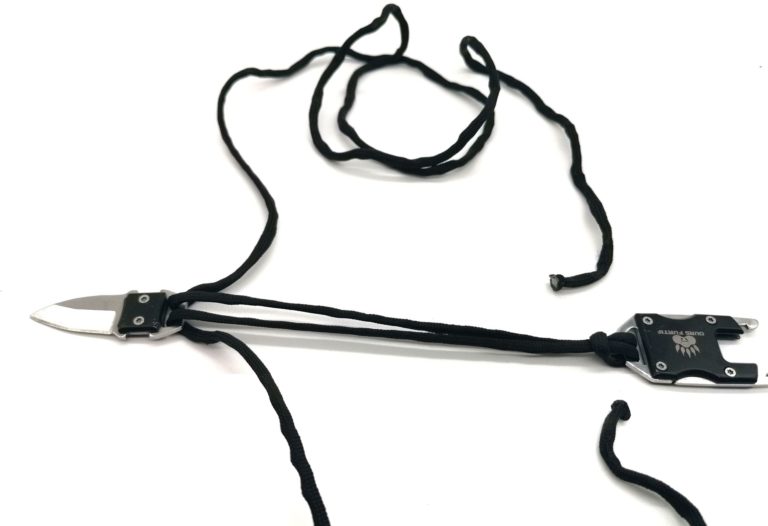
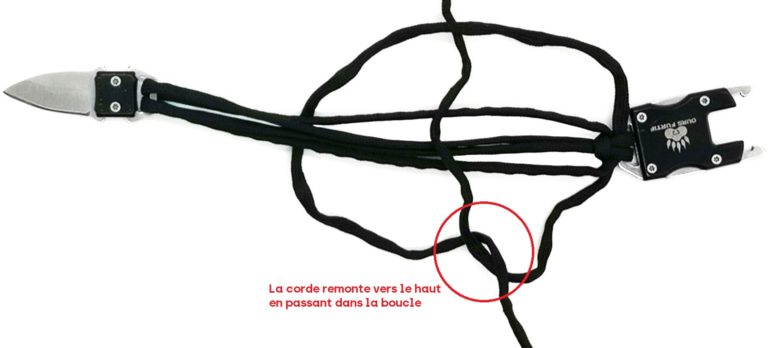
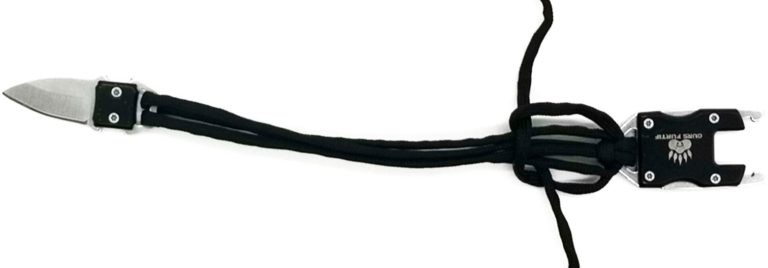
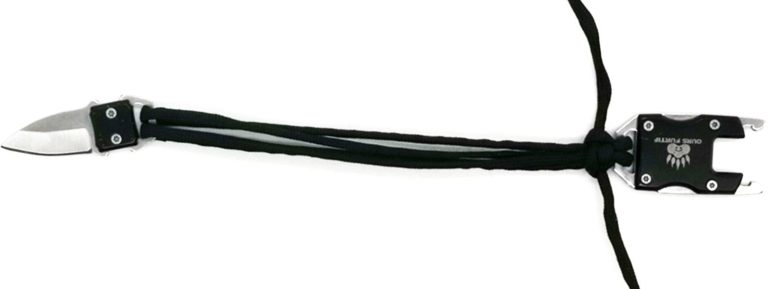
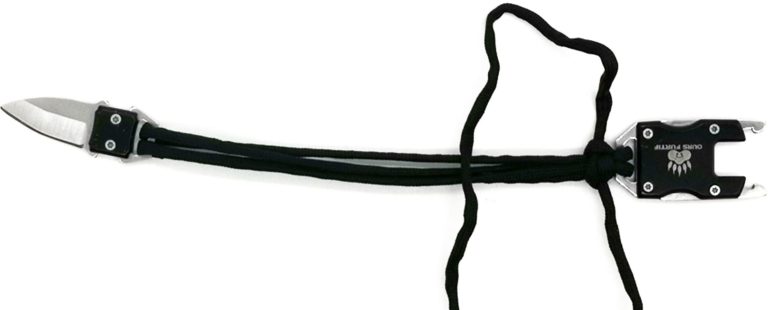
Ebook qui vous apprendra à réaliser le nœud cobra, et ainsi défaire et refaire votre bracelet (afin de pouvoir utiliser la paracorde pour d'autres utilisations ou simplement réajuster la taille du bracelet). Quelques astuces et exemples d'utilisation de la paracorde ont été ajoutés à la fin du guide.
Téléchargement Gratuit

Envoyer le lien de téléchargement à :

Inscrivez-vous pour obtenir du contenu exclusif et des recommandations chaque mois. Vous pouvez vous désabonner à tout moment.

Leave a Reply